Your link in bio is more than just a URL - it’s your online business card, store, and portfolio in one place.
In this guide, we’ll walk you through both methods so you can get your BioLink up and running instantly.
Option 1 – Create a BioLink Page from Scratch
Step 1 – Access the BioLink Creator
- Log in to your Zlinkoo account.
- On your Dashboard, click the #BioLink Page button.
- You’ll see two options: BioLink Pages BioLink Templates
- BioLink Pages
- BioLink Templates
- For this method, click BioLink Pages.
Step 2 – Create Your Custom Link
- A popup will appear asking you to choose your custom URL.
- Your link will follow this format: zlinkoo.com/your-custom-name
- Type your desired name and click Create.
- If available, your BioLink will be created, and you’ll be redirected to the BioLink Editing Page.
Step 3 – Explore the BioLink Editor
The editor has 3 main sections:
- Settings – Customize colors, fonts, backgrounds, layout, and profile image.
- Blocks – Empty at first; will show all content you add.
- Add Blocks – Add content like links, contact forms, social media icons, videos, countdown timers, email collectors, and more (over 50+ options).
Step 4 – Add and Manage Content
- Go to Add Blocks and choose your desired block type.
- Customize it with your text, links, or media.
- Save - the block appears in Blocks.
- In Blocks, you can: Reorder content Edit by clicking the 3 dots Delete unwanted blocks
- Reorder content
- Edit by clicking the 3 dots
- Delete unwanted blocks
Step 5 – Customize Your Page Design
In Settings, adjust:
- Background color or image
- Button styles & animations
- Fonts and theme presets
Step 6 – Publish & Share
Click Save or Publish and share your link anywhere:
zlinkoo.com/mybrand
Option 2 – Create a BioLink Page Using a Template
If you want your page ready in seconds, use a pre-made template.
Step 1 – Access Templates
- From the dashboard, click #BioLink Page.
- Select BioLink Templates.
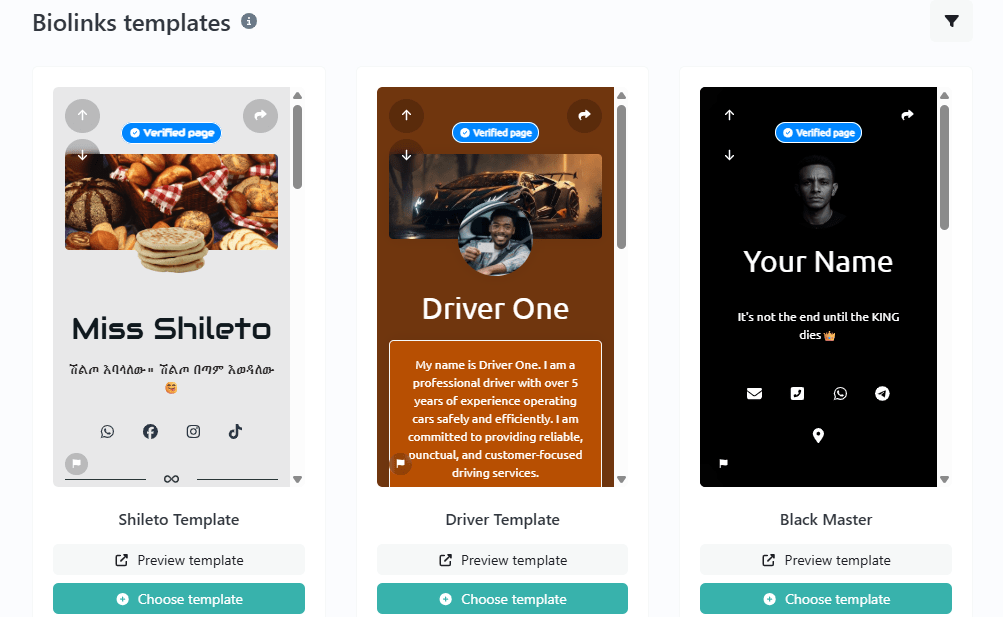
Step 2 – Choose Your Template
- Browse the template cards with Preview and Choose Template options.
- Click Choose Template on the one you like.
Step 3 – Set Your Custom Link
- A popup will ask for your username: zlinkoo.com/custom-name
- Type your name, click Create, and if available, your page is generated instantly.
Step 4 – Edit Pre-Loaded Content
Unlike the blank version, your Blocks section will already contain content from the template. You can:
- Turn blocks on/off using the toggle switch.
- Edit any block by clicking the 3 dots.
- Delete blocks you don’t need.
- Add new blocks from the Add Blocks tab.
💡 Pro Tip: Click Update regularly so you don’t lose your changes.
Final Tips for a Perfect BioLink
- Keep it simple and easy to navigate.
- Use your logo or profile image for branding.
- Highlight your most important links first.
- Add a clear call-to-action button.
- Test your link on mobile before sharing.
With Zlinkoo, you’re just a few clicks away from having your own personalized mini-website that works everywhere you share your link.